Pumpkin Fudge-Crunch Bars

Published on November 10, 2025
4.8 (245 reviews)

I first discovered the magic of pumpkin in a tiny bakery on a crisp October afternoon when I was a college sophomore. The baker, an elderly woman with flour‑dusted hands, handed me a slice of what she

Save This Recipe!
Click to save for later - It only takes 2 seconds!
Pumpkin Fudge-Crunch Bars
Prep Time
20 min
Cook Time
15 min
Servings
12 bars

Why You'll Love This Recipe

✓ Perfect Balance of Sweet and Spice: The creamy pumpkin base is sweetened just enough to let the warm spices – cinnamon, nutmeg, and a hint of ginger – shine. This balance makes the bars comforting in autumn and surprisingly delightful year‑round.
✓ Crunchy Texture Layers: A generous coating of toasted pecans, pumpkin seeds, and a drizzle of dark chocolate creates a satisfying crunch that contrasts with the soft, fudgy interior, giving each bite a multi‑dimensional mouthfeel.
✓ No‑Bake Simplicity: All you need is a microwave or stovetop to melt the chocolate and bind the fudge; there’s no oven required for the base, making it a quick, mess‑free dessert that still feels indulgent.
✓ Customizable for All Diets: Swap coconut oil for butter, use maple syrup instead of honey, or replace the chocolate with white chocolate – the recipe adapts easily to vegan, gluten‑free, or low‑sugar preferences.
✓ Crowd‑Pleaser Presentation: 
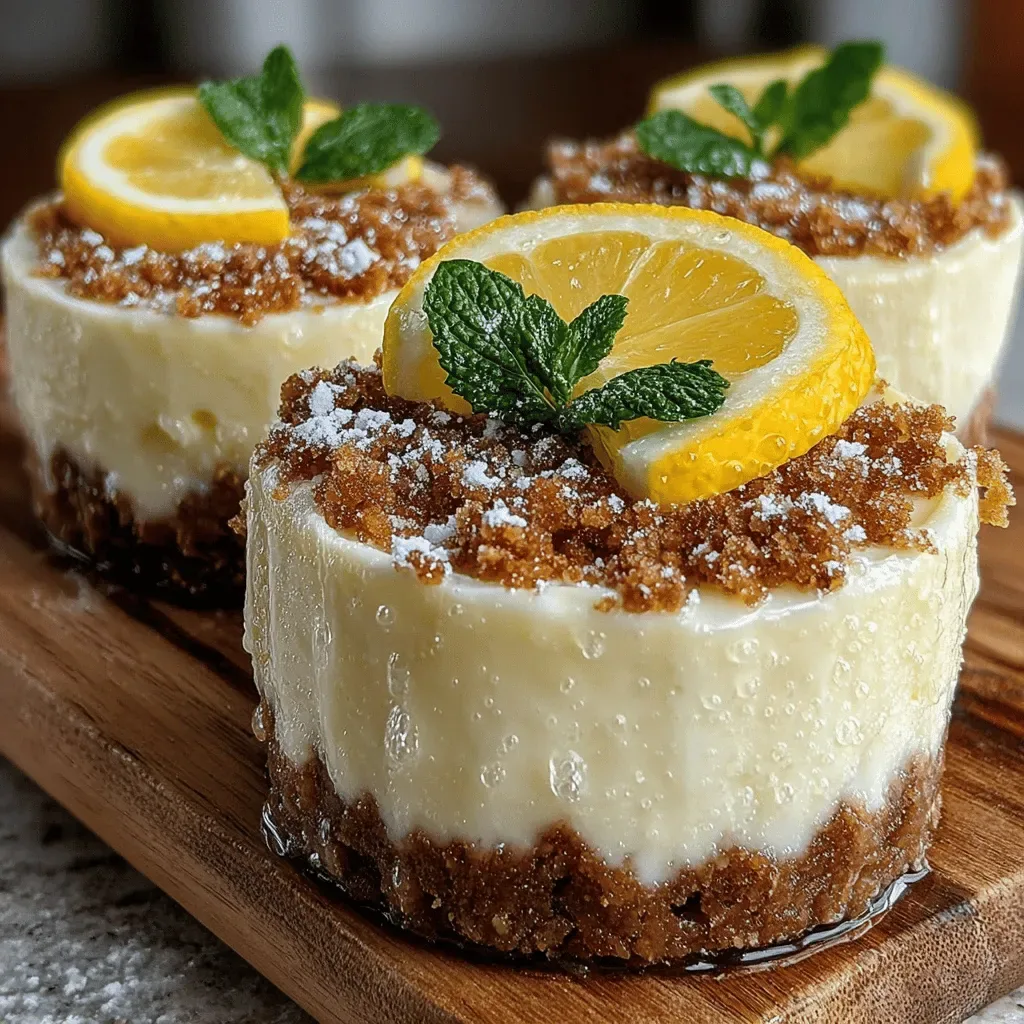
The vibrant orange of the pumpkin fudge paired with the glossy dark chocolate topping makes these bars look as impressive as they taste, perfect for potlucks, holiday tables, or a simple after‑dinner treat.

I first discovered the magic of pumpkin in a tiny bakery on a crisp October afternoon when I was a college sophomore. The baker, an elderly woman with flour‑dusted hands, handed me a slice of what she called “Pumpkin Fudge‑Crunch” – a dense, velvety bar studded with toasted seeds and a glossy chocolate drizzle. The moment the bar melted on my tongue, the sweet, earthy pumpkin mingled with the bite of caramelized nuts, and I felt an instant connection to the season’s warmth. That memory stayed with me, resurfacing every time the first leaves turned gold.

Years later, after moving to a bustling city and juggling a demanding career, I missed the comfort of that humble bakery treat. I began experimenting in my tiny kitchen, trying to recreate that perfect harmony of flavors without the commercial equipment. After countless trials – some too sweet, others too dry – I finally nailed a version that honored the original while adding my own twist: a richer chocolate coating and a sprinkle of sea salt to heighten the pumpkin’s natural sweetness. The result was a bar that could stand on its own at a casual brunch or be the star of a holiday dessert spread.

What makes this recipe truly special is its simplicity paired with depth. The base is a no‑bake fudge that sets quickly, allowing you to focus on the texture contrast created by toasted nuts and seeds. The use of real pumpkin puree gives an authentic flavor that artificial pumpkin spice blends simply cannot match. Moreover, the recipe is forgiving – you can adjust sweetness, swap nuts, or even make it completely dairy‑free without compromising the final product. Every bite tells a story of nostalgia, creativity, and the joy of turning a simple pantry staple into a show‑stopping dessert.

½ cup coconut oil (or unsalted butter) Coconut oil keeps the bars dairy‑free and adds a subtle tropical note; butter gives a richer mouthfeel.
⅓ cup pure maple syrup (or raw honey) Both provide a nuanced sweetness that complements pumpkin; adjust to taste.
¼ cup almond flour Adds body and a subtle nutty flavor without gluten; you can substitute oat flour if preferred.
1 tsp ground cinnamon Provides warm spice; freshly ground is more aromatic than pre‑ground mixes.
½ tsp ground nutmeg Adds depth; a pinch too much can become overpowering.
¼ tsp ground ginger A subtle zing that lifts the pumpkin flavor without turning it into gingerbread.
¼ tsp sea salt Enhances sweetness and balances the chocolate coating.
½ cup dark chocolate chips (70 % cacao) Provides a bitter contrast; you can substitute milk chocolate for a sweeter bar.
⅓ cup toasted pecans, coarsely chopped Adds crunch and buttery flavor; walnuts or almonds work as alternatives.
⅓ cup pumpkin seeds (pepitas) Provides a light, nutty bite; lightly salted for extra flavor.

Instructions

Pumpkin Fudge-Crunch Bars
1

Toast the nuts and seeds

Preheat a dry skillet over medium heat. Add the chopped pecans and pumpkin seeds, stirring constantly for 4‑5 minutes until they turn golden and release a fragrant aroma. Transfer them immediately to a plate to stop the cooking process, as residual heat can cause burning. This step is crucial because toasted nuts provide a deeper flavor and a satisfying crunch that raw nuts cannot achieve. If you prefer a sweeter note, drizzle a teaspoon of maple syrup over the nuts during the last minute of toasting, but watch closely to avoid caramelization that could become bitter.

Pro Tip: Use a wooden spoon for stirring; metal can cause uneven heating and small hot spots.
2

Combine wet ingredients

In a medium saucepan, melt the coconut oil (or butter) over low heat until fully liquid. Remove from heat and whisk in the pumpkin puree, maple syrup (or honey), sea salt, and the spice blend (cinnamon, nutmeg, ginger). Continue whisking until the mixture is smooth, glossy, and slightly thickened – this should take about 2‑3 minutes. The spices should be evenly distributed, giving the mixture a uniform amber hue. If the mixture looks too runny, let it sit for a minute; the natural thickening agents in pumpkin will absorb some of the liquid.

Pro Tip: For a smoother texture, blend the wet mixture in a countertop blender for 30 seconds before pouring into the pan.
3

Incorporate dry components

Sift the almond flour into the wet mixture to avoid lumps. Gently fold the flour using a rubber spatula, ensuring that every corner of the pan is scraped. The batter should be thick enough to hold its shape when pressed into a pan, but still pliable. If the mixture feels too dry, add a tablespoon of extra maple syrup; if it’s too loose, sprinkle in a little more almond flour, one teaspoon at a time, until you reach the desired consistency. This balance is essential for the bars to set firmly after cooling.

Pro Tip: Over‑mixing can develop gluten in the almond flour, resulting in a tougher texture – fold just until combined.
4

Press the base into a pan

Line an 8×8‑inch square baking pan with parchment paper, leaving an overhang on two sides for easy removal. Transfer the thickened pumpkin mixture into the pan and use the back of a spatula or your hands (slightly dampened) to press it down evenly, creating a smooth, compact surface. The goal is to eliminate air pockets that could cause the bars to crack later. If the mixture sticks to the spatula, lightly oil the utensil or sprinkle a pinch of almond flour on the surface.

Pro Tip: A flat-bottomed glass or a small cake pan works well for an ultra‑smooth top.
5

Melt the chocolate coating

Place the dark chocolate chips in a microwave‑safe bowl. Heat in 30‑second intervals, stirring after each burst, until the chocolate is completely melted and glossy. This usually takes 1‑2 minutes total. Be careful not to overheat; chocolate can seize and become grainy if it reaches a boil. Once melted, let it sit for a minute so it thickens slightly – this will help it set into a firm glaze rather than a runny drizzle.

Pro Tip: Adding a teaspoon of coconut oil to the chocolate gives a shinier finish and prevents blooming.
6

Add the crunchy topping

Evenly sprinkle the toasted pecans and pumpkin seeds over the pressed pumpkin base. Press them lightly so they adhere to the surface but retain their individual shape. The nuts not only add texture but also lock in moisture, helping the bars stay soft inside while providing a satisfying bite on the top.

Pro Tip: For an extra flavor boost, toss the nuts with a pinch of smoked paprika before scattering.
7

Drizzle the chocolate

Using a spoon or a small offset spatula, drizzle the melted chocolate over the nut‑topped surface in a decorative pattern – think zig‑zags, circles, or a simple blanket. Work quickly before the chocolate begins to set. If any chocolate pools in unwanted areas, gently tilt the pan to spread it evenly. The chocolate will create a glossy, slightly firm layer that adds richness and a pleasant snap when you bite through it.

Pro Tip: Sprinkle a tiny pinch of flaky sea salt on the chocolate while it’s still wet for a gourmet finish.
8

Cool and set

Place the pan in the refrigerator for at least 1 hour, or until the fudge base is firm and the chocolate glaze has fully set. This chilling step is vital; it allows the fats to solidify, creating a clean slice when you cut the bars. For faster set‑up, you can place the pan in a freezer for 20‑30 minutes, but be careful not to let it freeze solid, which can cause the chocolate to crack.

Pro Tip: Use a ruler to mark the pan into 12 equal sections before chilling – this ensures uniform bars.
9

Slice and serve

Using a sharp, non‑serrated knife, run it under hot water, dry, and slice the chilled slab into 12 even bars. The hot blade ensures clean cuts without dragging the chocolate. Transfer each bar to a serving plate, optionally dusting with a light sprinkle of extra cinnamon or a drizzle of leftover melted chocolate for an extra visual flourish. Serve at room temperature for the best flavor balance, or keep chilled for a firmer bite.

Pro Tip: Store any leftovers in an airtight container; the bars stay moist for up to a week.

Expert Tips

Tip #1: Use Freshly Roasted Pumpkin

Roasting your own pumpkin intensifies its natural sugars and eliminates the watery texture of canned varieties. Cut a small sugar pumpkin in half, remove the seeds, brush with a little oil, and roast at 375°F for 45‑50 minutes. Once softened, scoop out the flesh and puree it in a food processor until silky. This process not only adds depth of flavor but also ensures the fudge sets properly without excess moisture.

Tip #2: Toast Nuts in Butter for Extra Aroma

While a dry skillet works, tossing the pecans and pumpkin seeds in a tablespoon of melted butter before toasting adds a buttery richness that pairs beautifully with the dark chocolate glaze. The butter also helps the nuts release their natural oils, resulting in a more even, caramel‑like crust.

Tip #3: Chill the Pan Before Adding the Base

Place the prepared parchment‑lined pan in the refrigerator for 10 minutes before pressing the pumpkin mixture in. A cold surface helps the fudge set faster and reduces the chance of spreading, giving you sharper edges and a cleaner final appearance.

Tip #4: Use a Thermometer for Chocolate

Chocolate should be melted to 45‑50°C (113‑122°F). Using a kitchen thermometer prevents overheating, which can cause the chocolate to seize or develop a dull, matte finish. If the temperature exceeds 55°C (131°F), add a teaspoon of coconut oil and stir vigorously to bring it back into temper.

Tip #5: Add a Pinch of Espresso Powder

A quarter teaspoon of instant espresso powder hidden in the wet mixture amplifies the chocolate flavor without imparting a coffee taste. This subtle enhancement deepens the overall richness and makes the bars feel more indulgent.

Tip #6: Freeze for a Quick Slice

If you’re short on time, after the chocolate sets, place the whole pan in the freezer for 15 minutes. This firms the bars enough to cut cleanly without the need for a full hour of refrigeration, though the texture will be slightly firmer.

Tip #7: Finish with a Light Citrus Zest

A fine grate of orange zest sprinkled over the top right before the chocolate sets adds a bright, aromatic lift that cuts through the richness and highlights the pumpkin’s natural sweetness.

Common Mistakes & How to Avoid Them

Mistake 1 – Using Canned Pumpkin Pie Filling

Pumpkin pie filling contains added sugars, spices, and thickeners that throw off the flavor balance and make the fudge too sweet and watery. Always choose plain pumpkin puree or make your own roasted puree for authentic taste and proper texture.

Mistake 2 – Over‑mixing the Batter

Excessive stirring develops the gluten in almond flour, leading to a dense, rubbery bar. Fold the dry ingredients just until they disappear; a few streaks are fine and will disappear as the bar sets.

Mistake 3 – Over‑heating Chocolate

Melting chocolate at too high a temperature causes it to seize, turning grainy and losing its shine. Use short microwave bursts and stir frequently, or melt over a double boiler, keeping the temperature below 50°C.

Mistake 4 – Skipping the Chill Time

Cutting the bars while the fudge is still warm results in crumbly, uneven pieces and a smeared chocolate glaze. Patience is key – refrigerate at least one hour for a firm, clean slice.

Mistake 5 – Not Using Parchment Paper

Without parchment, the bars can stick to the pan, making removal messy and causing breakage. The overhang also acts as a convenient “handle” for lifting the whole slab out cleanly.

Variations & Creative Twists

1. White Chocolate & Cranberry

Swap the dark chocolate glaze for white chocolate chips melted with a splash of orange zest. Sprinkle dried cranberries among the toasted nuts for a tart contrast that mirrors classic Thanksgiving flavors.

2. Vegan Coconut‑Cashew Version

Replace coconut oil with extra‑virgin olive oil, use maple syrup exclusively, and choose vegan dark chocolate. Add a handful of chopped cashews for a buttery crunch, and ensure the almond flour is certified gluten‑free if needed.

3. Spiced Chai Infusion

Introduce a pinch of cardamom, clove, and black pepper into the spice blend. Finish the top with a drizzle of chai‑spiced caramel (caramel mixed with a dash of chai concentrate) for an exotic, warming twist.

4. Gluten‑Free Oat Flour Base

Swap almond flour for finely ground oat flour, which yields a softer crumb while keeping the bars completely gluten‑free. Oat flour also adds a subtle sweetness that reduces the need for extra syrup.

5. Boozy Rum‑Rum

Add a tablespoon of dark rum or spiced rum to the wet mixture before combining with the dry ingredients. The alcohol evaporates slightly during chilling, leaving behind a warm, caramel‑like depth that pairs beautifully with the chocolate.

Storage & Reheating

Store the bars in an airtight container lined with parchment to prevent them from sticking together. Keep them in the refrigerator for up to 7 days; the cool environment maintains the firm texture of the fudge and prevents the chocolate from blooming.

If you prefer a softer, room‑temperature bite, let the bars sit out for 15‑20 minutes before serving. For a quick warm‑up, place a single bar on a microwave‑safe plate and heat for 10‑12 seconds; this softens the chocolate glaze without melting the interior, giving a delightful gooey center.

Freezing is also an option: wrap each bar individually in plastic wrap, then place them in a zip‑top bag. They freeze well for up to 3 months. Thaw in the refrigerator overnight before enjoying.

Serving Suggestions

Frequently Asked Questions

Yes, you can, but choose a 100 % pure pumpkin puree without added sugars, spices, or thickeners. Drain any excess liquid with a fine‑mesh sieve and pat dry with paper towels before mixing. The texture may be slightly softer, so you might need to add an extra tablespoon of almond flour to achieve the right firmness.

The original recipe already uses almond flour, which is naturally gluten‑free. Just ensure any additional flour (if you substitute) is a certified gluten‑free variety such as oat flour, rice flour, or a gluten‑free all‑purpose blend. Also double‑check that your chocolate chips and other packaged ingredients are labeled gluten‑free.

Absolutely! Toasted sunflower seeds, pumpkin seeds, or even toasted coconut flakes work well. For a softer crunch, try chopped dried apricots or figs, though they add extra sweetness and may require a slight reduction in maple syrup.

Use a microwave in short 30‑second bursts, stirring well after each burst. This method gives you precise control and prevents overheating. If you notice the chocolate thickening too quickly, add a teaspoon of coconut oil and stir until smooth.

Yes. Replace the chocolate glaze with a caramel or maple glaze. Melt butter, brown sugar, and a splash of heavy cream, then drizzle over the bars. Add a pinch of sea salt for contrast. The texture will be softer, but the flavor remains rich.

Because the bars contain coconut oil and chocolate, they can be kept at room temperature for up to 2 days in a cool, dry place, but the texture will be softer and the chocolate may develop a slight bloom. For optimal texture, refrigerate.

Nutrition (Per Serving)

Approximate values based on 12 bars

Calories
260 kcal
Total Fat
16 g
Saturated Fat
9 g
Carbohydrates
22 g
Sugars
12 g
Protein
4 g
Fiber
3 g
Sodium
140 mg

Recipe Summary

Prep
10 min
Cook
30 min
Total
40 min
Servings
3
Category: Desserts recipes
Cuisine: International
Difficulty: Easy
Course: Main
Quick Tips
  • Make ahead friendly
  • Freezer safe 3 months
  • Easily doubled
  • Customizable

Ingredients

  • 1 ½ cups pumpkin puree (freshly roasted)
  • ½ cup coconut oil (or unsalted butter)
  • ⅓ cup pure maple syrup (or raw honey)
  • ¼ cup almond flour
  • 1 tsp ground cinnamon
  • ½ tsp ground nutmeg
  • ¼ tsp ground ginger
  • ¼ tsp sea salt
  • ½ cup dark chocolate chips (70 % cacao)
  • ⅓ cup toasted pecans, coarsely chopped
  • ⅓ cup pumpkin seeds (pepitas)

Instructions

1
Toast the nuts and seeds

Preheat a dry skillet over medium heat. Add the chopped pecans and pumpkin seeds, stirring constantly for 4‑5 minutes until they turn golden and release a fragrant aroma. Transfer them immediately to ...

2
Combine wet ingredients

In a medium saucepan, melt the coconut oil (or butter) over low heat until fully liquid. Remove from heat and whisk in the pumpkin puree, maple syrup (or honey), sea salt, and the spice blend (cinnamo...

3
Incorporate dry components

Sift the almond flour into the wet mixture to avoid lumps. Gently fold the flour using a rubber spatula, ensuring that every corner of the pan is scraped. The batter should be thick enough to hold its...

4
Press the base into a pan

Line an 8×8‑inch square baking pan with parchment paper, leaving an overhang on two sides for easy removal. Transfer the thickened pumpkin mixture into the pan and use the back of a spatula or your ha...

5
Melt the chocolate coating

Place the dark chocolate chips in a microwave‑safe bowl. Heat in 30‑second intervals, stirring after each burst, until the chocolate is completely melted and glossy. This usually takes 1‑2 minutes tot...

6
Add the crunchy topping

Evenly sprinkle the toasted pecans and pumpkin seeds over the pressed pumpkin base. Press them lightly so they adhere to the surface but retain their individual shape. The nuts not only add texture bu...

7
Drizzle the chocolate

Using a spoon or a small offset spatula, drizzle the melted chocolate over the nut‑topped surface in a decorative pattern – think zig‑zags, circles, or a simple blanket. Work quickly before the chocol...

8
Cool and set

Place the pan in the refrigerator for at least 1 hour, or until the fudge base is firm and the chocolate glaze has fully set. This chilling step is vital; it allows the fats to solidify, creating a cl...

You May Also Like

Discover more delicious recipes

Zucchini Twirl Turkey Meatballs Recipe Healthy Recipes
Cheesy Ground Beef Taco Pie Recipe Dinner Recipes
Apple Pie Overnight Oats Breakfast and Brunch
Hearty One-Pan Chili Delight One-Pot Meals
Crispy Air Fryer Garlic Herb Chicken Wings Air Fryer Recipes
Save this recipe
Join Our Community

Get Weekly Recipe Inspiration

Join thousands of food enthusiasts. Receive exclusive recipes, cooking tips, and culinary inspiration delivered to your inbox.